
If your pool needs refilling more often than the weather explains, something is wrong. The question is whether you’re losing water to evaporation, a leaking fitting, a cracked shell, failing plumbing underground, or an equipment problem on the pad. Each one requires a different fix, and spending money on the wrong one wastes time and doesn’t solve the problem.
Here’s how to find a leak in a pool: Start by confirming the water loss is real with a bucket test. Then inspect the equipment pad for visible dripping. Compare how much water the pool loses with the pump running versus the pump off. Watch whether the water level stabilises at a specific height. Dye-test the most common leak points: skimmers, returns, lights, and any visible cracks. If those steps don’t locate the source, the leak may be in underground plumbing, and professional pressure testing and acoustic detection are the next step.
That process moves from simple observation to targeted testing, and it’s the same logic a leak detection technician uses. The difference is the equipment and experience available at each stage.
First, Make Sure Your Pool Actually Has a Leak
Before you start inspecting fittings and buying dye, confirm that the water loss is actually abnormal. Pools lose water to evaporation every day. In the Lowcountry’s summer heat, that loss can be noticeable, and it varies with temperature, wind, humidity, and whether the pool is covered.
Splash-out from swimming, backwash water sent down the drain, and even a stuck backwash valve can all reduce the water level without any leak being present. If your pool has an automatic fill device, turn it off before testing. An auto-filler masks leaks by constantly replacing the lost water, which means the pool could be leaking for months without the level ever visibly dropping.
How to Do the Bucket Test
The bucket test is the simplest way to separate evaporation from an actual leak. Here’s how:
- Fill the pool to its normal operating level, typically the middle of the skimmer opening.
- Turn off the auto-fill device if you have one.
- Place a five-gallon bucket on the top step of the pool so it sits partially submerged. Fill the bucket with pool water to roughly match the pool’s water level.
- Mark the water level inside the bucket and the pool’s water level on the outside of the bucket (or on the pool wall near the bucket) with tape or a marker.
- Leave the pool unused for 24 hours. No swimming, no splashing, no running water features.
- After 24 hours, compare the two levels.
If the pool’s water level has dropped more than the water inside the bucket, the pool is losing water beyond what evaporation explains. That’s a leak.
If both levels dropped about the same amount, the loss is likely evaporation. Repeat the test over a second 24-hour period to confirm, since a single windy or rainy day can affect results.
For a more useful reading, run the bucket test twice: once with the pump running for 24 hours, and once with the pump off for 24 hours. The difference between those two results gives you a diagnostic clue about where the leak may be, which is covered in Method 3 below.
For a deeper explanation of evaporation versus leaks, see our guide on whether your pool is leaking or just evaporating.
8 Ways to Find Where Your Pool Is Leaking
Once the bucket test confirms abnormal water loss, the next step is narrowing down where the water is going. These eight methods move from the simplest visual checks to the point where professional equipment becomes necessary.
1. Measure and Track the Water Loss
Before doing anything else, establish how much water you’re actually losing and how consistently.
Mark the water level on the tile or skimmer face with a piece of tape. Check it at the same time each day. Record the loss. Consistent loss of the same amount every day suggests a steady, fixed leak. Loss that varies with pump operation or weather may point in a different direction.
Tracking also helps if you eventually call a professional. Telling a technician “the pool drops about an inch a day with the pump running” gives them a much more useful starting point than “it seems like it’s losing water.”
2. Inspect the Pool Equipment Pad
Walk over to the equipment and look for water where it shouldn’t be.
Check for dripping or moisture around pump shaft seals and union connections. Look at the base of the filter housing and around the multiport or push-pull valve. Inspect heater connections, chlorinator fittings, and any plumbing joints on the equipment pad. Check whether the backwash line is dripping or running when it shouldn’t be.
Equipment leaks are often the simplest to find because they leave visible evidence: drips, puddles, wet concrete, or mineral staining where water has been evaporating over time.
If the equipment pad is dry, the leak is somewhere else in the system, either in the pool shell, the fittings, or the underground plumbing.
3. Compare Water Loss With the Pump On vs. Off
This is one of the most valuable DIY diagnostic steps, and it’s the one most online guides don’t explain well enough.
Run the bucket test for 24 hours with the pump on. Then run it again for 24 hours with the pump off. Compare the results.
| What You Observe | What It May Suggest | Worth Investigating |
|---|---|---|
| Pool loses noticeably more water with the pump running | A pressure-side (return-side) plumbing issue, equipment connection, or backwash/waste line | Return plumbing, equipment pad, waste line |
| Pool loses noticeably more water with the pump off | A suction-side plumbing issue or static-pressure leak | Suction lines, skimmer connections, main drain |
| Water loss is roughly the same either way | A shell crack, fitting leak, liner tear, light niche, or other static leak in the pool itself | Pool shell, fittings, skimmer throat, light, liner |
These are diagnostic clues, not proof. A pool that loses more water with the pump on doesn’t definitively mean the return line is broken. It means the return side of the system deserves investigation first. The same logic applies to all three scenarios. The pump-on/pump-off comparison narrows the search area. It doesn’t replace thorough testing.
4. Notice Where the Water Level Stops Dropping
If you stop refilling the pool and let the level drop naturally (without swimming in it), the water may eventually stabilise at a specific height. That height can be a useful clue.
If the water stops dropping right at the bottom of the skimmer, the skimmer throat, body, or connection may be the source. If it stabilises at the level of the return fittings, those fittings or the plumbing behind them deserve closer inspection. If it stops at the light niche, the light, conduit, or cord seal may be involved. If it drops below all the fittings and keeps going, the leak may be in the floor, the main drain, or underground plumbing.
Important safety note: Do not deliberately let your pool drain down to a dangerously low level to find where it stops. In areas with high water tables, particularly in coastal or low-lying regions, an empty or partially drained pool can crack, shift, or float from hydrostatic pressure pushing up against the shell. The water in the pool isn’t just for swimming. It also acts as counterweight against groundwater pressure. If the level drops significantly, consult a professional before allowing it to continue.
5. Dye-Test Suspected Leak Points
Dye testing is the most accessible way to confirm whether a specific crack, fitting, or connection is actively leaking.
You’ll need leak detection dye (a syringe of concentrated, slow-dispersing dye designed for pool use) or, in a pinch, dark food colouring, though purpose-made dye gives better control and visibility.
Turn the pump off and wait until the water is completely still. Any circulation current will move the dye and give you a false reading. Slowly release a small amount of dye within an inch of the suspect area and watch closely. If the dye holds in place and disperses naturally, the area is not leaking. If the dye is drawn toward or pulled into a crack, fitting, gap, or seam, water is actively escaping there.
Where to dye-test first:
- Skimmer throat (where the skimmer meets the pool wall)
- Return fittings (the face plates screwed into the pool wall)
- Pool light niche and cord seal
- Visible cracks in the plaster or shell
- Step joints and connections
- Liner seams, corners, and bead track areas (vinyl pools)
- Main drain cover and frame
Randomly squirting dye around the entire pool is not effective. Dye testing works when you already have a suspected location, either from the water-level clues above or from a visual inspection. It confirms whether a specific spot is actively losing water.
6. Check the Pool Shell or Liner Carefully
Different pool types develop leaks in different ways.
Plaster and gunite pools develop cracks from ground movement, settling, age, and freeze-thaw cycles. Look for cracks in the plaster, especially around fittings, the tile line, and where the floor meets the walls. Not every crack leaks, but any crack that collects debris or shows dark staining along its edges may be pulling in water and dirt, which indicates suction from water escaping.
Vinyl liner pools develop leaks from tears, punctures (including from vacuum heads or sharp objects), and separation at seams, corners, and bead tracks. Run your hand along the liner feeling for soft spots, wrinkles that have shifted, or areas where the liner has pulled away from the wall. Inspect the area around every fitting, as liner gaskets behind face plates are common leak sources.
Fiberglass pools are less prone to surface leaks but can develop cracks at stress points, particularly around plumbing penetrations and where the shell connects to the coping. Inspect all fittings and connections carefully.
For all pool types, use dye testing (Method 5) to confirm any suspected location before committing to a repair approach. A visible crack is not necessarily the source of the leak, and a leak doesn’t always leave a visible crack.
7. Check Skimmers, Returns, Lights, and Other Penetrations
Every point where something passes through the pool shell is a potential leak point. This includes skimmer bodies, return fittings, light niches, main drains, step connections, and spa spillway connections.
These penetrations are common leak sources because the bond between the pool shell and the fitting is subject to thermal expansion, ground movement, and vibration from the pump. Over time, the seal between the fitting and the shell can fail.
Skimmers are among the most common leak locations. The joint between the skimmer body and the pool wall, and the throat where the skimmer opening meets the tile or coping, are both failure points. Dye-test the skimmer mouth, the corners of the throat, and the base of the skimmer body.
Return fittings are held against the pool wall with a gasket behind the face plate. If the gasket degrades, water leaks behind the fitting into the wall cavity or through the plumbing connection. Loose face plates are an obvious check, but a tight face plate doesn’t guarantee a good gasket.
Pool lights are a frequently overlooked source. The light niche is sealed with a gasket or putty, and the conduit pipe running from the back of the niche to the junction box provides a direct path for water to travel behind the pool wall if the seal fails. Water following the conduit can emerge in the ground far from the pool, making it difficult to trace without professional inspection.
8. Have the Plumbing Professionally Pressure-Tested
If the bucket test confirms water loss, the pump-on/pump-off comparison points toward plumbing, and you can’t find the source at any visible fitting or surface, the leak is likely in a buried pipe. This is where DIY detection reaches its practical limit.
Professional pool leak detection uses equipment that homeowners don’t have access to:
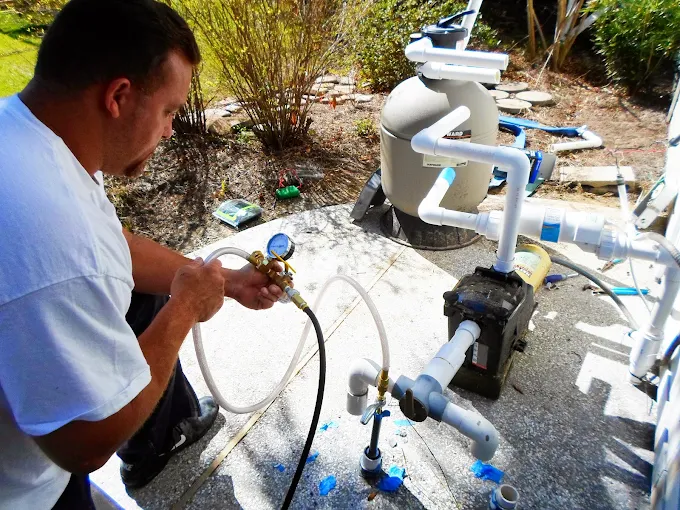
Pressure testing isolates individual plumbing lines (each suction line and each return line) and pressurises them independently. A line that holds pressure is intact. A line that loses pressure has a breach somewhere along its run.
Acoustic or ultrasound listening uses sensitive microphones to listen for the sound of pressurised air or water escaping through a break in the pipe underground. This narrows the location down to a specific area of the yard or deck rather than requiring excavation along the entire pipe run.
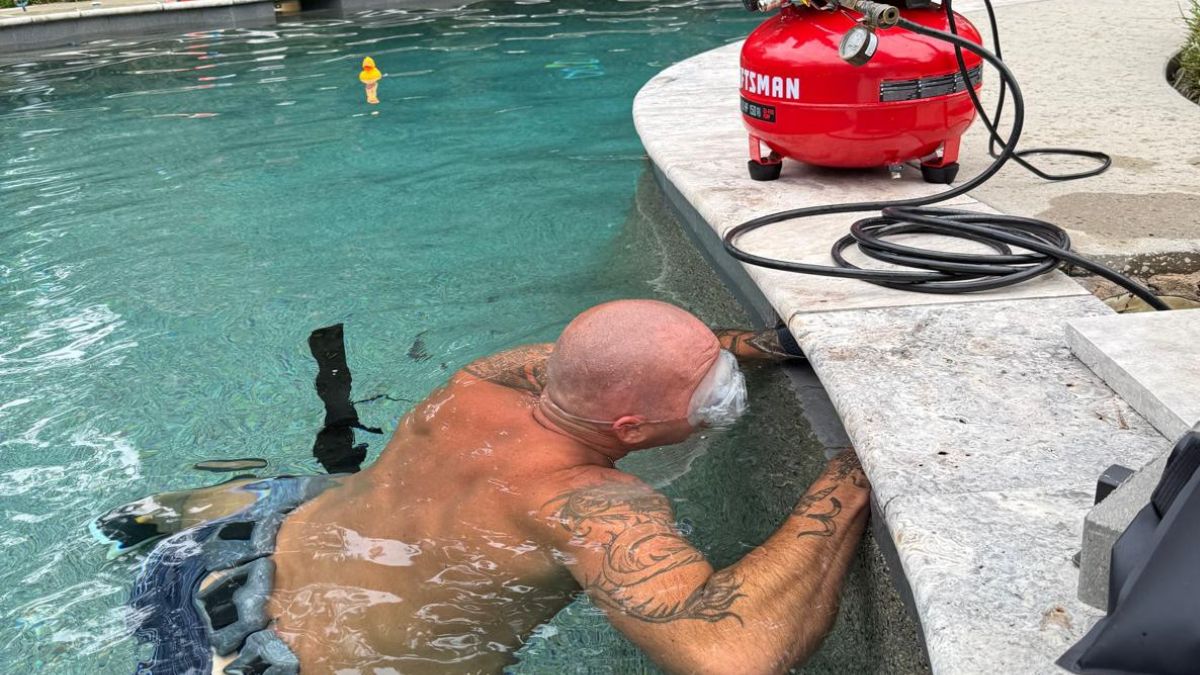
Underwater inspection involves a technician diving the pool to visually inspect and dye-test every fitting, crack, and connection below the waterline, including areas that can’t be seen adequately from the deck.
Finding which plumbing line is leaking and finding the exact physical location of the break are two separate stages. Pressure testing identifies the line. Acoustic detection narrows down where along that line the break is. The combination prevents unnecessary excavation.
Do not attempt to pressure-test pressurised plumbing yourself. The equipment and process require training, and incorrect pressure can damage plumbing connections.
What If You Know the Pool Is Leaking but Can’t Find Any Wet Ground?
This is one of the most common frustrations pool owners describe. The bucket test confirms water loss, but there are no puddles, no wet spots, no soggy grass, and no visible evidence anywhere around the pool.
That doesn’t mean the leak isn’t real. It means the water is going somewhere you can’t see. Underground plumbing leaks can send water into sand, gravel, or porous soil layers where it disperses without surfacing. Leaks beneath the pool deck drain into the ground under the concrete, where they may never create a visible wet spot. In areas with sandy or well-drained soil, even a significant leak can disappear without a trace at the surface.
Leaks through the conduit behind the pool light can travel along the pipe and emerge underground far from the pool wall, making the connection between the wet area and the pool difficult to see.
If the pool is losing water and there’s no visible evidence, the leak is almost certainly in buried plumbing, behind the pool shell, or in a fitting connection that drains into a concealed space. This is the scenario where professional pressure testing and acoustic detection become necessary.
When DIY Pool Leak Detection Should Stop
There’s a point in the process where continuing without professional equipment wastes time or creates risk. Call a leak detection specialist when:
- The bucket test confirms significant water loss but you can’t locate the source
- Dye testing around visible fittings and cracks is inconclusive
- The pump-on/pump-off comparison points toward plumbing
- You suspect the leak is under the deck, behind the shell, or underground
- Structural cracking or ground movement is visible
- The water level is dropping rapidly
- The leak involves the pool light, electrical components, or the light conduit
- You would need to drain the pool, excavate, or pressure-test plumbing to continue
These aren’t situations where more observation will help. They’re situations where diagnostic equipment and experience find the answer faster and with less damage to the pool and the surrounding property.
If you’ve confirmed water loss and can’t locate the source, The PoolCare Pros provides professional pool leak detection throughout Charleston and the Lowcountry using Leaktronics certified equipment. Call (843) 345-2415.
How Professionals Find Pool Leaks That Homeowners Can’t
A professional leak detection isn’t just a more thorough version of what a homeowner does with dye. It uses different tools for different stages of the process.
Stage 1: Isolate the system. The technician determines whether the leak is in the pool shell, the suction-side plumbing, the return-side plumbing, or the equipment. This is done through a combination of the pump-on/pump-off comparison, visual inspection, and pressure testing of individual lines.
Stage 2: Locate the line. If pressure testing identifies a compromised plumbing line, the next step is determining where along that line the break is located. Acoustic or ultrasound listening equipment detects the sound of air or water escaping through the pipe wall. The technician marks the location on the surface.
Stage 3: Confirm the exact point. The technician dives the pool to inspect and dye-test every fitting, crack, and connection below the waterline. This step catches leaks at penetrations that may not be visible or accessible from the deck.
Stage 4: Determine the repair. Once the location is confirmed, the repair approach depends on what’s leaking and where. Many shell, fitting, and surface leaks can be repaired underwater without draining. Plumbing repairs may require targeted excavation at the confirmed break point rather than exploratory digging along the entire pipe run.
The value of this process is precision. Accurate detection prevents the scenario where a homeowner or contractor digs up the wrong section of deck, replaces the wrong fitting, or patches the wrong crack, only to find the pool still losing water afterward.
Finding Pool Leaks in Charleston and the Lowcountry
Pool owners in the Charleston area deal with environmental conditions that affect both how leaks develop and how they’re diagnosed.
High water tables in many parts of the Lowcountry, especially on James Island, West Ashley, and in coastal communities, create hydrostatic pressure that pushes against the pool shell from below. This means draining a leaking pool for inspection is risky. The water in the pool provides essential counterweight against that groundwater pressure, and removing it can cause structural damage.
Clay soils that expand and contract with moisture cycles create ground movement that stresses plumbing connections and pool shells over time. This type of movement is a common underlying cause of leaks in the Lowcountry that may not be present in markets with more stable soil.
If your pool is losing water in the Charleston area, don’t drain it to find the leak. Most detection work and many common repairs can be performed with the pool full.
The PoolCare Pros provides Leaktronics certified pool leak detection across the Charleston Lowcountry, including Goose Creek, Summerville, North Charleston, Mt. Pleasant, West Ashley, James Island, and surrounding communities. Call (843) 345-2415 to schedule a leak detection.
Quick Diagnostic Reference
| Symptom | What It May Suggest | Recommended Next Step |
|---|---|---|
| Pool loses more water than the bucket | The pool has a leak (not just evaporation) | Proceed with the methods below |
| Pool loses more water with the pump running | Pressure-side plumbing or equipment connection | Inspect equipment pad and return plumbing |
| Pool loses more water with the pump off | Suction-side plumbing or static leak | Inspect suction lines and skimmer connections |
| Water level stops near the skimmer | Skimmer throat, body, or connection | Dye-test the skimmer area |
| Water level stops near the returns or light | Return fitting, gasket, or light niche | Dye-test the fitting or light |
| Water drops below all fittings and keeps going | Floor, main drain, or underground plumbing | Professional detection recommended |
| Wet equipment pad | Equipment leak (seal, union, valve, connection) | Visual inspection and tighten or replace |
| No visible wet areas anywhere | Underground plumbing or concealed shell leak | Professional pressure testing and acoustic detection |
| Dye testing is inconclusive | Leak may be hidden or in plumbing | Professional detection recommended |
| Air bubbles in return lines while pump runs | Suction-side air leak (may or may not lose water) | Check pump lid, unions, and suction plumbing |
Frequently Asked Questions
How do I find where my pool is leaking?
Start with the bucket test to confirm the loss is real. Then inspect the equipment pad, compare water loss with the pump on versus off, watch where the water level stabilises, and dye-test likely points like skimmers, returns, lights, and cracks. If those steps don’t locate it, the leak is probably in underground plumbing, and professional pressure testing is the next step.
How can I tell if my pool is leaking or evaporating?
The bucket test answers this. A bucket of pool water sitting in the pool loses the same amount to evaporation as the pool itself. After 24 hours, if the pool has dropped more than the bucket, you have a leak. If both dropped the same, it’s evaporation. Wind, heat, and water features all increase evaporation.
Can I use food colouring to find a pool leak?
You can, but purpose-made pool leak dye works better. Leak dye is thicker and disperses more slowly, making it easier to see whether the dye is being drawn into a crack or fitting. Food colouring disperses quickly in the water and can be hard to read. Either way, the pump must be off and the water completely still for the test to be meaningful.
Why does my pool leak only when the pump is running?
If water loss increases with the pump on, the leak is likely on the pressure side of the plumbing system. When the pump runs, it pressurises the return lines, which can force water out through a cracked pipe, failed joint, or loose equipment connection that doesn’t leak under static conditions.
Why does my pool lose water when the pump is off?
If loss increases with the pump off, the suction-side plumbing may be involved. With the pump off, static water pressure pushes against the suction lines. A crack or failed joint on the suction side can allow water to escape when there’s no pump-driven flow pulling water through the pipe.
What does it mean if the pool stops leaking at the skimmer level?
It suggests the leak is at or near the skimmer elevation. The skimmer throat, body, or the connection between the skimmer and the pool wall are common failure points. When the water drops below the leak, it stops losing water. Dye-test the skimmer area to confirm.
Can a pool leak underground without showing any wet spots?
Yes. Water from a buried plumbing leak can disperse into sand, gravel, or porous soil without ever reaching the surface. Leaks under pool decks drain into the soil beneath the concrete. In well-drained soil, a significant leak can go completely undetected visually, which is why pressure testing is necessary when the source can’t be found by observation.
Do I need to drain my pool to find a leak?
No. Most leak detection can be performed with the pool full, and draining can actually create risks, especially in areas with high water tables where hydrostatic pressure can damage an empty pool shell. Professional leak detection is specifically designed to locate leaks with the pool at normal operating level.
How do professionals find underground pool leaks?
Professionals isolate and pressure-test individual plumbing lines to identify which pipe is compromised. Then acoustic or ultrasound listening equipment locates the physical break point underground by detecting the sound of air escaping through the pipe wall. This two-stage process identifies both the leaking line and the repair location without exploratory excavation.
When should I call a professional for pool leak detection?
Call a professional when the bucket test confirms water loss but you can’t locate the source through visual inspection and dye testing. Also call if plumbing is suspected, the leak may be underground or under the deck, structural damage is visible, the water level is dropping rapidly, or the light niche or electrical components may be involved.